Complete Guide to Plant Propagation
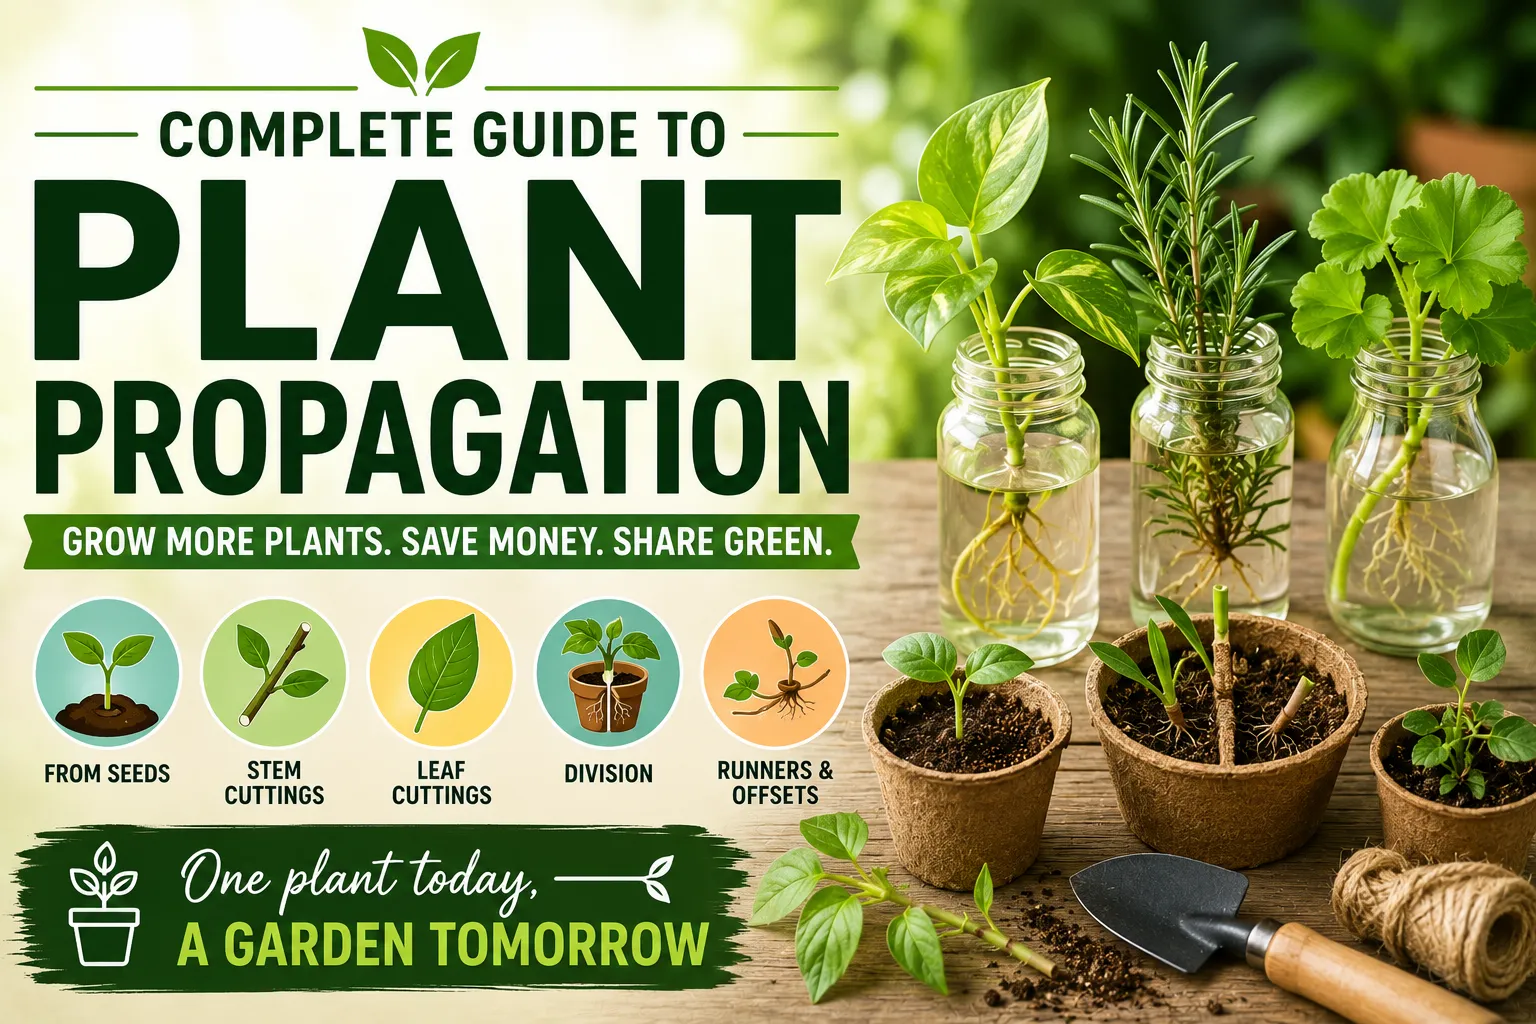
Complete Guide to Plant Propagation
Plant propagation is one of the most useful skills a gardener can learn.
Instead of buying a new plant every time you want to expand your garden, propagation allows you to create new plants from seeds, stems, leaves, roots or other parts of an existing plant. With the right technique, a single healthy plant can eventually become several, dozens or even hundreds.
Propagation can also be a practical way to preserve favorite plants, share them with friends, replace aging specimens and create a garden for less money.
But successful propagation isn’t simply a matter of putting a cutting in soil and waiting.
Different plants respond to different methods, and factors such as moisture, temperature, light, timing and cleanliness can make the difference between a vigorous new plant and a cutting that never develops roots.
This guide explains the major propagation methods, when to use each one, how to get started, common mistakes to avoid and how to give new plants the best possible start.
For a broader look at how flowers, growing conditions and different garden practices fit together, see the Complete Guide to Flower Gardening.
What Is Plant Propagation?
Plant propagation is the process of producing new plants.
There are two broad categories:
- Sexual propagation, which involves seeds and reproduction through flowers and pollination
- Asexual or vegetative propagation, which creates genetically similar plants from existing plant material
Seed propagation is the most familiar method, but vegetative propagation can be much faster for many ornamental and edible plants.
For example, you can potentially create a new plant from:
- A stem cutting
- A leaf
- A section of root
- A division of an established plant
- A runner
- A bulb
- A rhizome
- A tuber
- A specialized stem
The best method depends on the plant.
Sexual vs. Asexual Propagation
Understanding the difference helps explain why some propagation methods produce plants that look almost identical to the parent while others can produce considerable variation.
Sexual Propagation
Sexual propagation involves seeds.
The new plant develops from genetic material contributed through reproduction.
As a result, seedlings can differ from their parent plants.
This is particularly important when growing:
- Flowers
- Vegetables
- Fruit trees
- Ornamental plants
Seed-grown plants can produce exciting variations, but they may not always retain every characteristic of the parent.
Asexual Propagation
Asexual propagation uses parts of an existing plant.
Examples include:
- Stem cuttings
- Leaf cuttings
- Root cuttings
- Division
- Layering
- Runners
The resulting plants are usually genetically very similar to the parent plant.
This makes vegetative propagation particularly useful when you want to preserve specific characteristics such as:
- Flower color
- Fruit quality
- Leaf shape
- Growth habit
- Disease-resistant traits
Why Gardeners Propagate Plants
There are plenty of reasons to learn propagation.
Save Money
Instead of purchasing multiple plants, you can multiply plants you already own.
Preserve Favorite Plants
A successful cutting can preserve a beloved plant.
Expand Your Garden
Propagation makes it easier to fill garden beds, containers and borders.
Share Plants
Cuttings and divisions make thoughtful gifts for other gardeners.
Replace Aging Plants
You can propagate young replacements before an older plant declines.
Preserve Valuable Varieties
Vegetative propagation can help maintain particular cultivars.
Learn More About Plants
Propagation teaches you how plants grow, reproduce and respond to their environment.
The Main Methods of Plant Propagation
The most common methods include:
- Seed propagation
- Stem cuttings
- Leaf cuttings
- Root cuttings
- Division
- Layering
- Air layering
- Runners and offsets
- Bulbs and bulbils
- Rhizomes
- Grafting and budding
You don’t need to master all of them immediately.
Start with the method that suits the plant you want to propagate.
1. Propagating Plants From Seeds
Seed propagation is the most traditional method.
Seeds contain the genetic material and stored resources needed to begin a new plant.
It’s particularly useful for:
- Annual flowers
- Vegetables
- Herbs
- Many trees
- Many native plants
Some plants are much easier to grow from seed than from cuttings.
How to Start Plants From Seed
Step 1: Choose Good Seeds
Use fresh, viable seeds from a reliable source.
Older seeds may still germinate, but germination rates can decline depending on the species and storage conditions.
Step 2: Choose a Suitable Container
Seed trays, small pots or other clean containers with drainage can work well.
Step 3: Use a Suitable Growing Medium
A fine, well-draining seed-starting medium helps provide a suitable environment for emerging roots.
Avoid using heavy garden soil in small seed containers if it becomes compacted or drains poorly.
Step 4: Sow at the Correct Depth
Some seeds need to be covered while others need light to germinate.
Follow the instructions for the specific plant.
Step 5: Maintain Moisture
Keep the growing medium evenly moist without keeping it permanently waterlogged.
Step 6: Provide Appropriate Temperature and Light
Germination requirements vary significantly among species.
Step 7: Transplant Carefully
Once seedlings are strong enough, move them into larger containers or their final growing location.
Don’t Plant Seeds Too Deep
One of the most common seed-starting mistakes is burying seeds too deeply.
Tiny seeds may have limited stored energy.
If they are buried too far beneath the surface, the emerging seedling may run out of energy before reaching the light.
Some seeds should barely be covered or simply pressed onto the surface.
Always check the requirements for the species you’re growing.
Seed Stratification
Some seeds have dormancy mechanisms that prevent them from germinating immediately.
They may require:
- Cold temperatures
- Warm temperatures
- Alternating temperature periods
- Scarification
- Specific moisture conditions
Cold stratification, for example, involves exposing certain seeds to a period of cool, moist conditions before planting.
This mimics seasonal conditions that the plant would experience naturally.
Seed Scarification
Some seeds have hard outer coatings that restrict water absorption.
Scarification involves carefully weakening that outer layer.
Depending on the species, this can involve:
- Lightly scratching the seed coat
- Nicking it carefully
- Using other species-appropriate methods
Don’t scarify seeds unless you know the species benefits from it.
Excessive damage can destroy the seed.
2. Stem Cuttings
Stem cuttings are among the easiest propagation methods for many plants.
A cutting is a section of stem that can develop new roots under suitable conditions.
Plants commonly propagated from stem cuttings include many:
- Houseplants
- Shrubs
- Herbs
- Ornamental plants
Examples can include pothos, coleus, rosemary, mint and many other species.
Choosing the Right Stem
A healthy cutting is generally preferable to one taken from a weak or diseased section.
Look for:
- Healthy growth
- No obvious disease
- No major insect damage
- Suitable nodes
- Appropriate stem maturity
A node is a point on the stem where leaves, buds or branches emerge.
Nodes are extremely important for many cutting-based propagation methods.
How to Take a Stem Cutting
A general process is:
- Select a healthy parent plant.
- Use a clean, sharp cutting tool.
- Take an appropriate section of stem.
- Remove unnecessary lower leaves.
- Place the cutting in an appropriate propagation medium.
- Maintain suitable moisture.
- Provide bright but appropriate light.
- Wait for roots to develop.
- Transplant once the cutting is established.
The exact procedure varies by species.
Why Nodes Matter
For many plants, roots develop from nodes or nearby tissue.
That’s why a cutting consisting only of a leafless section with no suitable node may fail to produce a complete new plant.
When taking a stem cutting, make sure the portion placed in the propagation medium includes an appropriate node when required by the species.
Softwood, Semi-Hardwood and Hardwood Cuttings
Stem cuttings can be classified according to the maturity of the wood.
Softwood
Taken from young, flexible growth.
These can root relatively quickly in some species but may dry out easily.
Semi-Hardwood
Taken from partially mature growth.
This method is commonly used for some shrubs and woody plants.
Hardwood
Taken from mature, dormant wood.
Hardwood cuttings are often used for certain woody plants and are commonly taken during dormant periods.
The ideal cutting type depends on the species and season.
Propagating in Water
Some houseplants root readily in water.
This can be especially useful for beginners because root development is easy to observe.
The general method is:
- Take a healthy stem cutting.
- Remove leaves that would sit underwater.
- Place the appropriate node below the water.
- Keep leaves above the water.
- Change the water regularly.
- Place the cutting in suitable light.
- Wait for roots to develop.
Once a healthy root system forms, the cutting can often be moved into an appropriate growing medium.
Water Propagation Isn’t Ideal for Every Plant
Some plants root poorly in water.
Others may develop roots that transition less easily to soil than roots produced directly in a suitable growing medium.
If a species is known to root better in a propagation medium, follow that method instead.
Water propagation is a technique, not a universal rule.
For established plants, proper moisture management is equally important. Understanding how to water garden plants correctly can help prevent the excessive moisture problems that can also affect newly propagated plants.
Propagating in Soil or Growing Medium
Many cuttings can be rooted directly in a suitable medium.
Advantages include:
- Less transplant shock between water and soil
- Good aeration when the medium is appropriate
- Direct development in the environment where the plant will ultimately grow
A suitable propagation medium should generally retain enough moisture while still providing oxygen around the developing roots.
What Makes a Good Propagation Medium?
A propagation medium often needs:
- Good drainage
- Adequate moisture retention
- Air spaces
- A relatively clean environment
- Suitable physical structure
Materials used in propagation mixes can include:
- Perlite
- Vermiculite
- Coco coir
- Peat-based materials
- Fine bark
- Sand
- Commercial propagation mixes
The appropriate combination depends on the plant.
Good propagation begins with good growing conditions, and healthy soil is an important part of that broader picture. The Ultimate Guide to Soil Health explains how soil structure, organic matter, drainage and nutrient availability influence plant growth.
3. Leaf Propagation
Some plants can produce new plants from individual leaves or sections of leaves.
This method is especially associated with certain houseplants and succulents.
Plants that may be propagated through leaves include some:
- Begonias
- African violets
- Snake plants
- Succulents
However, not every plant can produce a complete new plant from a leaf.
How Leaf Propagation Works
Depending on the species, you may:
- Place the whole leaf on a growing medium
- Insert the leaf stalk into the medium
- Cut a leaf into sections
- Place leaf sections in contact with a suitable medium
New roots and shoots may develop from appropriate tissue.
Species-specific instructions are important because techniques vary considerably.
Snake Plant Leaf Cuttings
Some snake plants can be propagated by cutting leaves into sections.
The process generally involves:
- Cut a healthy leaf.
- Divide it into appropriate sections.
- Keep track of the orientation of each section.
- Allow cut surfaces to dry where appropriate.
- Place sections in a suitable propagation medium.
- Maintain moderate moisture.
- Wait for roots and new growth.
One important consideration is that certain variegated cultivars may not retain their exact variegation when propagated from leaf sections.
4. Root Cuttings
Some plants can produce new growth from pieces of their roots.
Root propagation is less common for beginners but can be effective for appropriate species.
It is generally used with plants that naturally have the ability to generate shoots from root tissue.
The procedure requires careful handling because the parent plant’s roots can be damaged.
When Root Propagation Makes Sense
Root cuttings may be useful for certain:
- Perennials
- Woody plants
- Shrubs
- Plants that naturally spread through roots
Research the species before attempting this technique.
Not every plant can be propagated from roots.
5. Plant Division
Division is one of the easiest methods for mature plants that naturally grow as clumps.
Instead of encouraging a cutting to produce roots, you separate an existing plant into multiple sections.
This works well for many:
- Perennials
- Grasses
- Ferns
- Irises
- Hostas
- Certain houseplants
How to Divide a Plant
A general process is:
- Water the plant appropriately before division.
- Remove it from the soil if practical.
- Examine the root system.
- Identify natural sections or crowns.
- Separate the plant carefully.
- Ensure each division has adequate roots and shoots.
- Replant promptly.
- Water appropriately.
- Protect the divisions from excessive stress while they establish.
Don’t Divide Too Aggressively
Each division needs enough:
- Roots
- Growing points
- Stems or leaves
If you divide a plant into too many tiny pieces, the resulting sections may struggle to recover.
A few strong divisions are often better than many weak ones.
When Should You Divide Plants?
The ideal timing depends on the plant.
Many perennial plants are divided during:
- Early spring
- Fall
- Dormant periods
Avoid dividing plants during extreme heat or drought when possible.
The best timing is generally when the plant can recover with minimal stress.
6. Propagation by Runners
Some plants naturally produce horizontal stems called runners or stolons.
These can develop new plants along their length.
Strawberries are a familiar example.
The parent plant sends out a runner, and a young plant develops where it contacts suitable growing conditions.
How to Propagate From Runners
Once the young plant has developed roots:
- Allow it to establish.
- Keep it connected to the parent plant initially if appropriate.
- Encourage the new plant to root into soil.
- Once sufficiently established, separate it from the parent.
- Replant or leave it where it is.
This is one of the easiest natural propagation systems because the plant largely does the work for you.
7. Offsets and Pups
Some plants produce small daughter plants near the base of the parent.
These are often called:
- Offsets
- Pups
- Suckers
Depending on the species, they can be separated and replanted.
Examples can include certain:
- Aloe plants
- Bromeliads
- Succulents
- Bulb-forming plants
Wait until the offset is sufficiently developed before separating it.
8. Propagation by Layering
Layering involves encouraging a stem to produce roots while it is still attached to the parent plant.
This can be an excellent technique for plants whose cuttings are difficult to root.
The advantage is simple:
The parent plant continues supplying the developing section with water and nutrients while roots form.
Simple Layering
A flexible branch is bent toward the ground.
A section of the stem is placed against or slightly into the soil while the tip remains above ground.
Once roots develop, the rooted section can be separated from the parent.
Tip Layering
Some plants naturally root from the tips of their branches.
The branch tip is positioned in suitable soil and allowed to develop roots.
Once established, it can become an independent plant.
Compound Layering
Compound layering involves using a long flexible stem to create several rooted sections.
Different parts of the same branch can be positioned in contact with soil.
This method can potentially produce several new plants from one stem.
9. Air Layering
Air layering is useful for some woody plants and larger houseplants.
Instead of bending a branch to the ground, you encourage roots to form around a section of stem while it remains attached to the parent plant.
The process generally involves:
- Selecting a suitable stem.
- Making an appropriate wound or cut.
- Applying a moist rooting medium around the area.
- Wrapping the medium to retain moisture.
- Waiting for roots to develop.
- Cutting below the new root system.
- Planting the rooted section.
Air layering can be particularly useful when a plant has become tall or leggy and you want to create a new plant from an upper section.
10. Bulbs and Bulbils
Many bulb-forming plants can be propagated by separating offsets or dividing bulbs.
Examples include various:
- Lilies
- Onions
- Tulips
- Daffodils
- Other bulbous plants
The exact technique varies by species.
Some bulbs naturally produce daughter bulbs around the parent.
These can eventually be separated and replanted.
11. Rhizome Propagation
Rhizomes are modified stems that grow horizontally, often underground.
They can produce roots and shoots at different points along their length.
Examples include:
- Ginger
- Iris
- Some ornamental grasses
- Certain ferns
Rhizome division involves separating sections that contain viable growing points.
12. Tuber Propagation
Tubers are specialized storage organs.
Potatoes are one of the best-known examples.
A tuber contains buds or “eyes” that can produce new shoots.
Depending on the plant, tubers can sometimes be divided into sections as long as each piece contains an appropriate growing point.
13. Grafting
Grafting is a more advanced propagation technique.
It involves joining parts of two plants so they grow together.
The two main components are usually:
- Rootstock — provides the root system
- Scion — provides the desired upper growth
Grafting is widely used with:
- Fruit trees
- Roses
- Ornamental plants
- Some specialized crops
Why Grafting Is Useful
Grafting can combine desirable characteristics.
For example, the rootstock may offer:
- Disease resistance
- Adaptation to soil conditions
- Size control
- Cold tolerance
while the scion provides:
- Desired fruit
- Flower characteristics
- Growth habit
This makes grafting particularly valuable in commercial horticulture.
14. Budding
Budding is a specialized form of grafting.
Instead of attaching an entire stem section, a single bud from one plant is attached to suitable rootstock.
It is commonly used for certain:
- Fruit trees
- Roses
- Ornamental plants
Budding requires more precision than simple cuttings or division.
Propagation Tools You May Need
A basic propagation kit can include:
- Sharp pruning shears
- Clean knife
- Small pots
- Seed trays
- Propagation medium
- Labels
- Watering container
- Clear humidity cover
- Rooting hormone where appropriate
- Clean work surface
You don’t need expensive equipment to begin.
Clean tools and good technique are more important than having a large collection of gadgets.
Why Clean Tools Matter
Dirty cutting tools can transfer pathogens between plants.
Before taking cuttings:
- Clean the cutting tool.
- Remove visible debris.
- Disinfect appropriately when necessary.
- Allow the tool to dry where appropriate.
If you’re working with diseased plants, be especially careful about cross-contamination.
Don’t propagate from visibly diseased material unless you’re deliberately conducting a specialized recovery process.
Choosing the Best Parent Plant
Propagation starts with the parent.
Choose a plant that is:
- Healthy
- Vigorous
- Free from obvious disease
- Free from serious pest infestations
- Well established
If you propagate from a weak plant, you’re not necessarily giving the new plant a strong starting point.
Timing Matters
Many plants propagate more successfully during certain seasons.
Spring
Often excellent for:
- New growth
- Softwood cuttings
- Division
- Seed starting
Summer
Can work well for:
- Certain softwood cuttings
- Layering
- Some annual plants
Autumn
Can be suitable for:
- Division
- Hardwood cuttings
- Certain perennial propagation
Winter
Some plants enter dormancy and are best propagated through dormant hardwood material.
Always consider the plant’s natural growth cycle.
Temperature and Root Development
Roots generally develop within a suitable temperature range specific to the species.
If conditions are too cold:
- Rooting may slow
- Rot may become more likely if the medium stays wet
If conditions are excessively hot:
- Cuttings may lose water faster than they can replace it
- Stress can increase
- Leaves may wilt
Stable conditions are usually preferable to extreme fluctuations.
Humidity and Propagation
Cuttings without roots cannot replace water lost through their leaves efficiently.
High humidity can reduce water loss while roots are developing.
This is why gardeners sometimes use:
- Clear propagation domes
- Plastic covers
- Humidity trays
- Enclosed propagation boxes
But excessive humidity combined with poor ventilation can encourage fungal problems.
Don’t Keep Everything Soaking Wet
One of the most common propagation mistakes is assuming more water means faster rooting.
It doesn’t.
Roots need oxygen.
If the growing medium remains saturated, air spaces can disappear, increasing the risk of root or stem rot.
The ideal moisture level depends on the species and medium.
Light Requirements for Cuttings
Cuttings generally need enough light to support their remaining leaves, but freshly rooted material may be sensitive to intense direct sunlight.
A bright, appropriate location is often preferable.
Avoid placing delicate cuttings directly in harsh midday sun unless the species and setup are specifically suited to it.
Can Grow Lights Help?
Yes.
Grow lights can provide consistent illumination when natural light is limited.
However, intensity and duration should be appropriate for the species.
Too little light can produce weak growth.
Too much heat or excessive intensity can stress delicate cuttings.
Rooting Hormone: Do You Need It?
Rooting hormones can encourage root development in some plants.
They are commonly available as:
- Powders
- Gels
- Liquids
But they’re not necessary for every cutting.
Many easy-to-root plants will produce roots without them.
Rooting hormones can be more useful for plants that are slower or more difficult to root.
Don’t Overuse Rooting Hormone
More isn’t necessarily better.
Excessive amounts can damage some plant tissue or simply waste the product.
Follow the product instructions and use only an appropriate amount.
Common Propagation Problems
Cutting Wilts Immediately
Possible causes include:
- Excessive leaf area
- Low humidity
- Excessive heat
- Insufficient moisture
- Damaged cutting
Cutting Turns Black
Possible causes include:
- Rot
- Excess moisture
- Contamination
- Damaged tissue
No Roots Develop
Possible causes include:
- Wrong propagation method
- Incorrect season
- Poor cutting material
- Unsuitable temperature
- Excessive moisture
- Insufficient time
Leaves Turn Yellow
Possible causes include:
- Excess moisture
- Nutritional problems
- Natural stress
- Poor light
- Root problems
Don’t assume one symptom has only one cause.
Why Cuttings Rot
Rot commonly develops when plant tissue remains excessively wet and oxygen is limited.
To reduce the risk:
- Use a well-draining medium.
- Don’t overwater.
- Keep containers clean.
- Remove diseased material.
- Provide suitable airflow.
- Avoid burying excessive amounts of stem.
Why Cuttings Dry Out
Cuttings can lose moisture quickly before roots form.
Signs can include:
- Wilting
- Shriveling
- Crispy leaves
- Dry stems
Reduce unnecessary water loss by:
- Maintaining appropriate humidity
- Keeping cuttings out of harsh sunlight
- Reducing excessive leaf area
- Providing suitable moisture
Remove Some Leaves From Stem Cuttings
If a cutting has a large number of leaves, it may lose water faster than it can replace it.
Removing some lower leaves can reduce water loss.
However, don’t strip the cutting completely unless the species-specific method calls for it.
Remaining leaves can help the cutting continue photosynthesis.
Patience Is Part of Propagation
Not every cutting roots in a few days.
Some plants root quickly.
Others may take:
- Several weeks
- Several months
- An entire growing season
Don’t keep pulling up cuttings to check for roots.
Disturbing developing roots repeatedly can slow establishment or damage them.
How to Know When a Cutting Has Rooted
Possible signs include:
- New leaf growth
- Resistance when gently tested
- Visible roots through a clear container
- Increased stability in the medium
Don’t pull hard on a cutting to test it.
If you need to inspect the root system, do so carefully.
Transplanting Rooted Cuttings
Once a cutting has developed a healthy root system:
- Prepare an appropriate container.
- Use suitable potting medium.
- Handle the roots gently.
- Plant at the appropriate depth.
- Water appropriately.
- Keep conditions stable.
- Gradually acclimate the plant to stronger light if necessary.
Avoid immediately moving a delicate cutting from a humid propagation environment into harsh outdoor conditions.
Hardening Off New Plants
Plants grown under sheltered conditions may need time to adapt to outdoor environments.
Gradually expose them to:
- Stronger light
- Wind
- Temperature changes
- Lower humidity
This process is commonly called hardening off.
Moving a tender young plant directly from a protected indoor environment into intense outdoor sun can cause severe stress or leaf damage.
Propagating Houseplants
Houseplants are often excellent candidates for beginner propagation.
Depending on the species, you may use:
- Stem cuttings
- Leaf cuttings
- Division
- Offsets
- Runners
- Water propagation
Popular beginner-friendly plants can include:
- Pothos
- Spider plants
- Tradescantia
- Coleus
- Snake plants
- Some succulents
Always check the specific propagation method for the plant.
For gardeners working with limited indoor space, container growing can make propagation and plant maintenance easier. The Complete Beginners Guide to Container Gardening covers how containers, drainage and growing conditions affect plants.
Propagating Herbs
Many herbs can be propagated relatively easily.
Depending on the species, you may use:
- Seeds
- Stem cuttings
- Division
Examples include:
- Mint
- Basil
- Rosemary
- Thyme
- Oregano
- Sage
Mint, in particular, can spread aggressively, so consider growing it in containers if you don’t want it taking over a garden bed.
Propagating Vegetables
Vegetables can be propagated through different methods.
Seeds
Common for:
- Tomatoes
- Peppers
- Lettuce
- Carrots
- Beans
Division or Cuttings
Useful for certain crops.
Tubers
Used with crops such as potatoes.
Specialized Vegetative Methods
Some vegetables can regrow from portions of the plant, although the result may be better suited to producing additional leaves rather than a full replacement crop.
For gardeners who want to take propagation further into food production, the Ultimate Guide to Growing Vegetables at Home provides a broader look at growing edible crops.
Propagating Fruit Trees
Fruit trees can be grown from seed, but seedlings may not produce fruit identical to the parent tree.
This is one reason grafting and budding are widely used for fruit production.
A grafted tree can combine a desired fruiting variety with a suitable rootstock.
If you’re interested in preserving a particular fruit variety, vegetative propagation may therefore be preferable to growing from seed.
Seedlings vs. Cuttings
Each approach has advantages.
| Feature | Seeds | Cuttings |
|---|---|---|
| Genetic variation | Usually higher | Usually very low |
| Preserves parent traits | Not guaranteed | Generally yes |
| Cost | Often low | Very low |
| Rooting time | Depends on species | Depends on species |
| Suitable for annuals | Excellent | Sometimes unsuitable |
| Suitable for many houseplants | Sometimes | Often |
| Requires mature parent plant | No | Yes |
Neither method is universally better.
The right choice depends on the plant and your goal.
Propagation and Plant Genetics
Vegetative propagation generally produces clones of the parent plant.
That can be useful when you want consistency.
However, it also means that diseases or genetic weaknesses present in the parent can be carried into new plants.
Seed propagation introduces genetic variation.
This can create both desirable and undesirable differences.
Disease Can Spread Through Propagation
Propagation can multiply problems as easily as it multiplies healthy plants.
If the parent plant has:
- Viral disease
- Fungal disease
- Bacterial disease
- Serious pests
cuttings or divisions may carry those problems forward.
Inspect parent plants carefully.
Don’t propagate obviously diseased material unless you are following a specialized plant-health protocol.
Quarantine New Plants
If you’re propagating or exchanging plants with other gardeners, consider keeping new plants separate for a period.
This can help you identify:
- Aphids
- Mealybugs
- Scale insects
- Spider mites
- Fungal problems
before they spread to the rest of your collection.
Propagation for Indoor Gardening
Propagation is especially useful for indoor gardeners because many houseplants can be multiplied from relatively small pieces.
A sunny windowsill or suitable grow-light setup can become a small propagation station.
Keep the setup organized with:
- Plant labels
- Dates
- Propagation method
- Parent plant name
This helps you understand what works over time.
Keep a Propagation Journal
A simple record can make you a better propagator.
Write down:
- Plant species
- Date cutting was taken
- Type of cutting
- Propagation medium
- Light conditions
- Temperature
- Humidity
- Rooting hormone used
- Date roots appeared
- Transplant date
- Success or failure
After several propagation cycles, you’ll start to identify patterns.
Label Everything
If you’re propagating several plants at once, labels are essential.
Include:
- Plant name
- Variety if known
- Date
- Propagation method
Without labels, it can be surprisingly easy to forget which cutting is which.
Don’t Compare Every Plant to the Same Timeline
A pothos cutting and a woody shrub cutting should not be expected to root at the same speed.
Some plants naturally root rapidly.
Others are slow.
Some require specialized conditions.
Research the specific plant before deciding that a cutting has failed.
Beginner-Friendly Propagation Projects
If you’re new to propagation, start with plants that are relatively forgiving.
Good projects may include:
Project 1: Stem Cuttings
Try a suitable houseplant with flexible stems.
Project 2: Spider Plant Offsets
Separate established plantlets and pot them.
Project 3: Division
Divide a mature clumping plant.
Project 4: Herb Cuttings
Experiment with an easy-to-root herb.
Project 5: Seeds
Start a fast-growing annual or vegetable from seed.
These projects can teach different propagation principles without requiring specialized equipment.
A Simple Beginner Propagation Setup
You can create a basic setup with:
- Small pots
- Propagation medium
- Clean scissors
- Labels
- Clear humidity cover
- Water
- Bright indirect light
That’s enough to begin experimenting with many easy plants.
You don’t need a greenhouse.
Propagation in Small Spaces
Even apartment gardeners can propagate plants.
Useful options include:
- Windowsills
- Shelves
- Small grow-light stations
- Covered propagation trays
- Compact indoor greenhouses
The key is creating stable conditions rather than having a huge amount of space.
Propagation Outdoors
Outdoor propagation can work particularly well when:
- Temperature is appropriate
- Humidity is suitable
- Strong direct sunlight is controlled
- Wind exposure is manageable
- The growing medium drains well
A sheltered nursery area can be useful for young plants.
Protect New Plants From Extreme Weather
Young propagated plants are more vulnerable than established plants.
Protect them from:
- Extreme heat
- Frost
- Heavy rain
- Strong wind
- Harsh direct sunlight
Gradual acclimatization can dramatically improve survival.
Propagation and Sustainability
Propagation can reduce the need to buy new plants and can help gardeners make better use of existing plant material.
It can also encourage:
- Sharing plants locally
- Preserving heritage varieties
- Maintaining mature garden specimens
- Reducing unnecessary packaging
- Growing plants suited to local conditions
For gardeners interested in sustainability, propagation is a particularly rewarding skill.
Composting can complement propagation by helping gardeners make productive use of organic material. Learn more in the guide to making compost and using it effectively in a garden.
Ethical Plant Propagation
Not every plant should be propagated or distributed without considering legal or ethical restrictions.
Some commercial plant varieties are protected by intellectual property rights or plant breeders’ rights.
If a plant is protected, commercial propagation or selling propagated material may be restricted depending on local law.
Check applicable rules before selling or commercially distributing propagated plants.
Don’t Collect Wild Plants Without Permission
Propagation can be a wonderful way to conserve plants, but removing material from wild populations can damage ecosystems.
Avoid taking cuttings, seeds or whole plants from protected areas without permission.
Instead:
- Buy from reputable nurseries
- Collect only where legally permitted
- Propagate plants you already own
- Participate in legitimate conservation programs
Troubleshooting a Failed Propagation
If a cutting fails, don’t immediately assume you’re bad at propagation.
Ask:
Was the parent plant healthy?
Was the cutting taken at the right stage?
Did it contain the necessary growth points?
Was the medium too wet?
Was it too dry?
Was the temperature appropriate?
Was the light too intense or too weak?
Was the timing appropriate?
Was the plant actually suitable for that propagation method?
Propagation is partly a process of experimentation.
Failure can teach you what the plant requires.
The Most Common Beginner Mistakes
Overwatering
More water does not mean faster rooting.
Using Dirty Tools
Contamination can compromise cuttings.
Taking Weak Cuttings
Start with healthy plant material.
Using the Wrong Part of the Plant
Some plants require nodes, buds or specific tissues.
Too Much Direct Sun
Tender cuttings can dry out quickly.
No Labels
You may forget what you planted.
Disturbing Cuttings Too Often
Developing roots need stability.
Giving Up Too Quickly
Some plants simply take time.
A Step-by-Step Propagation Workflow
For many common cutting-based projects, this general sequence is useful:
1. Choose a Healthy Parent
Avoid diseased or heavily stressed plants.
2. Prepare Clean Tools
Use a sharp, clean cutting tool.
3. Take the Correct Cutting
Follow the species-specific method.
4. Prepare the Medium
Make sure it is appropriate and well draining.
5. Insert the Cutting Correctly
Ensure the necessary node or growing tissue is positioned properly.
6. Control Moisture
Keep the medium appropriately moist without saturating it.
7. Provide Suitable Light
Bright but appropriate light is often ideal for tender material.
8. Maintain Suitable Humidity
Reduce excessive water loss while allowing adequate airflow.
9. Wait
Give the cutting time to root.
10. Transplant Carefully
Move it once the root system is sufficiently developed.
How to Make Propagation More Successful
A few principles make a major difference:
Start with healthy material.
Use the right method for the species.
Keep tools and containers clean.
Don’t overwater.
Control excessive water loss.
Provide suitable light and temperature.
Avoid disturbing developing roots.
Be patient.
These fundamentals matter more than expensive propagation equipment.
Frequently Asked Questions
Can Every Plant Be Propagated?
No.
Plants differ significantly in their ability to reproduce through different methods.
Some are easy to propagate from cuttings, while others are better grown from seed, division or grafting.
Is Propagation Difficult?
It depends on the plant and method.
Some techniques are extremely beginner-friendly.
Others require experience and precision.
Starting with easy plants is the best way to build confidence.
Is It Better to Root Cuttings in Water or Soil?
Neither method is universally superior.
Some plants root easily in water.
Others perform better when placed directly into a suitable propagation medium.
Follow the requirements of the specific species.
How Long Do Cuttings Take to Root?
There is no universal timeline.
Some can root in days or weeks, while others can take much longer.
Temperature, plant species, cutting type, season and growing conditions all influence rooting.
Do You Need Rooting Hormone?
Not necessarily.
Many plants root readily without it.
It can be useful for certain difficult-to-root species.
Can You Propagate a Plant From a Single Leaf?
Some plants can be propagated from leaves, but many cannot produce a complete plant from a leaf alone.
Always check whether the species supports leaf propagation.
Can You Propagate Plants in Water Forever?
Some plants can survive in water for extended periods, but water-rooted plants may not always perform best indefinitely without an appropriate nutrient and root environment.
For many plants, transferring an established cutting into suitable growing medium is the better long-term approach.
Can You Propagate a Diseased Plant?
It’s generally best not to.
Diseases can be carried into new plants through propagation material.
Address plant health problems first where possible.
From One Plant to a Garden
Plant propagation can initially seem like a technical gardening skill, but the basic concept is surprisingly simple.
Plants have evolved numerous ways to reproduce, and gardeners can take advantage of those natural abilities.
Seeds allow genetic diversity.
Cuttings preserve desirable traits.
Division creates new plants from established clumps.
Layering allows roots to form while a stem remains attached to its parent.
Runners and offsets allow plants to produce their own young plants.
Grafting combines useful characteristics from different plants.
The key is matching the method to the species.
Once you understand that principle, propagation becomes much less intimidating.
Turning Propagation Into a Long-Term Gardening Skill
The best way to become good at propagation is to start small, keep records and learn from each attempt.
Take a few healthy cuttings rather than dozens. Try different propagation conditions. Note which methods work and which don’t. Pay attention to seasons, moisture, light and the type of plant material you use.
Over time, you’ll develop an understanding of how the plants in your own garden respond.
And that’s where propagation becomes especially rewarding.
A plant you bought once can become a source of new plants for years. A favorite shrub can be multiplied. A mature perennial can be divided among several garden beds. A simple cutting can eventually become a full-sized plant.
Instead of seeing gardening as a cycle of buying and replacing plants, propagation turns it into a cycle of growing, multiplying, sharing and preserving.